HomeAbout MeMy ShopGallery

Tuesday, July 8, 2014

TUTORIAL: A BEGINNER'S WET FELTING SEASCAPE. MY SUMMER BLOOMS


HELLO EVERYONE,

I learned wet felting skills from both books and a couple of classes I have taken in the past.  I thought I would share "My Way" of Wet Felting with you all. I hope you will find it helpful...

 Any questions just email me and I will be happy to try and answer them. 

I have been wanting to wet felt a "By The Sea" theme for in my bathroom for some time.  

First, I collected my array of white Merino Wool, Blended Merino/Tencel in the colors of Stonewashed and Mushroom, Tussah Silk, The Rose Fiber, Beautiful shades of blue and pink blended batt with Undyed Silk Noils, and other Silk Fibers for the Sea Base.  I also used Mohair Curls, Hand Dyed Firestar, Hand Dyed Merino Neps, and undyed Silk Hankie. 

For the very first time I used my new "Palm wash Boards" for wet felting.  I love them. 

To start I put down a couple of thick towels, my felting mat, and then put down bubble wrap with bubble side up on my mat.


Below is a flat photo of the Finished "By The Sea" art piece. I let it dry with wee folds in it to make them look like waves.  They flatten a bit to be more gentle waves. 


A BEGINNER'S TUTORIAL:  A WET FELTED SEASCAPE!

This is "MY" way I wet felted this project. I am sure there is several other ways other artist does their wet felting projects.

 There is many many books out there on wet felting to buy and in libraries.

 So this tutorial is not set in stone just "MY WAY" to  get started.

(1) I lay out 3 layers of white Merino Tops alternating each layer from Horizontal to Vertical to Horizontal.

(2) Then I layer on my blended Sea Batt, then the blended shades of blue Merino and Tencel, and last the beach Merino with Tencel called Mushroom. 

(3 and 4) Then I added my Mohair Curls,  Light Brown Merino Neps, and Rose Silk, and Firestar. I learned at the class down in Kentucky to use my embellishment fibers sparingly because it looks much better then in clumps.

 I really LOVE the "NEPS" on the beach area.  To me they looked like wee pebbles. What do you all think??

The below information I read in books or on the Internet.
 This part was not learned in any class.
 So this is "My Way" and "My Experiment" to see what would happen!!
 Big Smile.

( 4a) I then added some objects into my seascape by using "Resists" over the silk hankie X3.
 I then curled "Wool Fibers" around a wood bead, and then layered wool over it. I also did the same thing with a "Sea Shell", "Sea Glass" 3 in all, and a home made "Tyvek Bead". 

I used "Heartfelt Silks Wash Boards" tools to help me do the felting process. Great site. I love them. 

THE FELTING PROCESS

(5) Finally I put down my "fine mesh" so to begin the wetting and felting process.

I used my "Ballbrauser" tool and gently wet the whole piece with very warm water.  This part takes lots of very warm water and I also patted it while putting down the water. 

Then I used 100% Olive Oil Soap and gently rubbed it over the whole surface several times being careful not to displace any fibers or objects.

Then I used my
"New Palm Heart Felt Silks Wash Boards" in a circular motions over and over and over again both front and back of art piece until you feel the fibers are well stuck together.

 You do this part first gently and then more firmer as the fibers stick together more.

I then rinsed my project in warm water and squished it around gently to get all the soap out.  
Then I put in very cold water with a couple of tablespoons of White Vinegar and let it set awhile.  Then I rinsed it out again with plain cold water. 

Then I placed it on a old oven rack with a thick towel underneath and just let it dry naturally in front of a sunny window.

The photo below shows the felting process completed and with it being totally dried.

Then the exciting part for me was to "Reveal" the object I had hidden in the Seascape.

I very carefully started cutting away the felted fibers from around the "Sea Glass", "Sea Shell"," Tyvek Bead"..  They all survived the felting process very well. 


Below I cut away the wood bead to reveal a wee crater. smile. Then I carefully cut down the middle of the 3 resist to reveal the Silk Hankies underneath.

   The silk Hankies had started to felt into the wool below but I easily pull them up to look like crashing waves..

A photo of the Finished Seascape...

I still need to do some embroidery and beading on this seascape before it is really finished. smile. 

When I get it "Seascape" hung on the bathroom wall I will show you all the "Very Finished Seascape"..... Hopefully Soon.  Another smile.


I would love to hear back what you all think of
 "My Wet Felted Seascape" and the
 "Beginner Wet Felted Tutorial".

 Hopefully this tutorial will get others interested in wet felting. I know you would love it too. 

I really like wet felting and I am very excited about learning many new techniques..

Thank you all for visiting my blog and leaving your lovely messages for me to read.  Greatly appreciated.

  Hugs Judy 

I leave you with a photo of some of My "Summer Blooms". 

What a Glorious time of year..

Thursday, June 19, 2014

Computer Woes Kentucky Fiber Festival and Wet Felted Classes FUN FUN FUN!!!!!


Hello Everyone,

I can't believe it has been 2 months since my last posting.  very sad face.
Between ongoing computers woes ( still not really fixed yet) family commitments and a wee holiday down to Kentucky my plate has been very full. 

I truly enjoyed our get away to Kentucky where I expected nice warm sunny weather verses the very cold Spring we've had in Michigan.  Not to be.  The very cold tempertures followed us all the way to Kentucky and stay until the last 2 days we were in Lexington.

 But despite the weather I had a very grand time and totally enjoyed chatting with ladies who also loved playing with fibers too.

I had a super great time at the
 "Kentucky Sheep and Fiber Festival" which was May 17th and 18th..


 Nicola Brown from Ireland taught 2 of the wet felted classes I took. I made a flat landscape from Alpaca fibers, silk hankie, Firestar fibers, Mulberry silk and Mohair curls.


When I got home I turned it into a Ipad Case and added beads. I also made a wet felted round ball button for the case at home and stitched it on. 

What do you all think??


My Ipad fitted perfectly into its new fiber case. 


I also took a "Nuno Felted Scarf" class from a lovely lady named Annette Browning.  

The scarf was silk chiffon and then I placed Merino tops, Hand Dyed Mulberry silks and hand dyed Mohair locks on both front and back. 

I was so pleased with the finished scarf.  It did shrink more than I thought it would.


The second class I took from Nicola Brown as a
 "Felted Flower" Class. I the main part of the flower was hand dyed Alpaca Fibers.
  I had also brought some fibers with me and I added hand dyed mulberry silks in pastel lavender, blue, green and white. 

When I got home I then added lots of sparkling beads.


And here is a photo of "My Finished 3 Wet Felted Projects".


I also had fun, fun and more fun shopping!! 

I bought a very lovely hand dyed batt and a package of pink Merino Roving

From Alpaca Fiber Solutions I bought very lovely hand dyed silk hankies picture in bottom right corner above.

 I also bought some very wonderful "hand spun fibers" in shades of green from Elizabeth.


I stocked up on some hand dyed curls and locks.


You all know I love to work in my gardens.  This year everything has been a bit late in blooming. 

Jan my dear friend has the most gorgeous "Beauty Bush". it is huge and it smells heavenly. Jan tells me it has been growing for 17 years. Jan has give me a couple of cuttings to start my own Beauty Bush. Smile.

My "Snowball Bush" was very grand this year.  Oh, how I love my Peonies.  I have 5 Peonies flowers about my garden.. They also have a sweet perfume and they always make me smile when I look at them..


My Dear Hubby son and his family came to visit him on Fathers dad. We all had a great time chatting and eating apple and cherry pie with ice cream..

I hope to get back on track soon.  I thank everyone for their patience.  I hope to catch up with all my blogging friends soon.  

Thanks for visiting and taking the time to leave me a comment. 

Hugs Judy

Tuesday, April 22, 2014

MY NEEDLE FELTED LANDSCAPE CLASS 2 WET FELTED TREASURE BOX OUR NEW ROCKWOOD HARDSIDE CAMPER and SOMETHING PRETTY CROCHET BLANKET


Hello Everyone,

On April 12th I gave
 "My Second Needle Felted Landscape Class" at Artsplace in Fremont.  

All the ladies were very kind and lovely to teach and they all had great enthusiasm..
 I took a class photo of all "My Student's" Beautiful Art.  I think they all did a wonderful job of creating their art. 
 Thank you ladies for coming to my class.


Carnival Treasure Box


A few weeks back I wet felted a Treasure Box using Merino Wool in Pink and Green.  I used a balloon as my template and wrapped several layers of each color around most of the balloon..


I then took my flat top piece and placed it over a skinny cone form and pin it in folds around the cone.  I love how the folds turned out...

  I searched in my yarn stash and fold two pastel color of pink and green of 100% wool and twisted them together and used them on the top and bottom of the project. I think the wool yarn gave it a "Carnival" look.  Then I wet felted a wee ball to place on the top..

 I thought it needed more glimmer so I added some sparkling beads too.


My Finished "Carnival Wet Felted Treasure Box.

What do you all think???


Spring has arrived so it is "Time To Travel"...

New Rockwood Hardside Premier Camper!!! 


Last year after the accident and our Truck being total we decided to sell our RV.. We were not going to camp anymore. 

Then half way through our Very Long and Harsh Winter we  started "Dreaming" of traveling again. What to do because we had bought A "Car" to replace the truck.

 So after much research we found a camper called, "Rockwood Hardside Premier" that was light enough to be pulled by the car and fast and easy to put up.. See video "Here"..

  There was Only One place that had them for sale in Michigan and it was a 3 hours drive from home so We bought it over the phone.  VBG 

It is made by the Amish down in Indiana.  We pick up our "New 2015 Rockwood Hardside Premier" 2 weeks ago and below is some photos of our new camper with hubby getting it ready to roll.


It can be put up in 3 1/2 minutes according to Dear Hubby. It has 500 lbs of storage and we had a custom bike rack added to it.


It has a heated mattress.  A removable table to take outside to use as a picnic table if needed and this space can be used for extra sleeping.


A stainless steel refrigerator, sink and microwave. It has air conditioning and heat. It has a digital cable hook up so we can have a  TV too.  It is perfect for us.  We plan to get a screen in porch so we can be outside to eat and relax in comfort with no bugs.  LOL

We have booked our first camping trip down to
 "The Kentucky Horse Park" in May. Click "Here"  to see this wonderful park..


Something Pretty

I have completed 82 blocks so this past week I placed them in a pattern on the floor to see how many more I would need. Deciding on a pattern was a tough one for me.  It looks like I will need 28 more blocks.  Grrrrrrrrrr...  But I am getting close to the end.  

I have never made a crochet Blanket before..  Could someone please tell me if I need to block the blocks before stitching them all together or can that be done after it is finished???  Thanks for your kind help.. 

What do you think of my "Something Pretty Blocks???


This year I am joining in On "Linda's Crafty Corner" Blog "Stash-Buster Link Party"
 Thanks Linda for hosting this party. 


I would Like to Thanks Everyone for visiting My Blog and leaving their Lovely Comments.

Happy Spring and Happy Autumn to My Down Under Friends.  vbg

Hugs Judy

Last but not least is the one photo of all
 "My Crocuses Blooming" before that were all smashed by a mother's nature cruel hail storm last week.. 

They certainly make My Heart Sing when I looked at them in My Garden.. They come and go so quickly..I am sad to say that there is Not anything else blooming in my garden yet.


Saturday, April 5, 2014

PHOTO TUTORIAL: A NEEDLE FELTED BEAUTIFUL SPRING BLOOMING HEDGEROW NEW IPAD AIR


Hello Everyone,

Celebrating Springtime in all its Glory....

Today I am going to share with you all A Photo Tutorial of a Needle Felted Spring Blooming Hedgerow.  

The photo below is the Finished Art Piece. I really loved creating this piece.  I even added a wee Dragonfly for Good Luck. 


To start I used "Core Wool Batting" two layer each felted separately onto a craft felt. The size of this art piece is 8 inches wide and 9 1/2 inches long. 

  Then I added the Hedgerow by using blended shades of browns Merino Wool Roving Tops. Then I added the beautiful Sky also by using blended blue Merino Wool Roving Tops.

Photo 4 shows the starting of adding the Hollyhock blooms. I created them from "Art Yarn" and lovely hand dyed Locks in shades of green.


Below is an up close of the bottom edge of my Hedgerow.  I used hand dyed wool Yarn using loose French Knots for the Hollyhock Flowers.

 I added bead flower to create "Blue Bells".  I also added bead leaves along the bottom of the Hollyhocks.

I also sparkling Pretty Yellow Primroses along the bottom with sparkling "Fuzzy Stuff" threads.


I also added some Lovely Climbing Pink Roses using Light Pink Fuzzy Stuff threads.

 And on the far left side I added
 "Gorgeous Yellow Climbing Jasmine" to finish off "My Spring Beautiful Spring Blooming Hedgerow". 

One always needs a wee "Tatted Dragonfly" fluttering about in the Sparkling Ocean Blue Sky.

 I also added wisps of Tussah White Silk to the sky to also add sparkle.


Below is an up close photo of "My Finished Beautiful Spring Blooming Hedgerow"..

What do you all think???

I hope I have inspired someone to try Needle Felting. It is so much fun.. 

 I would like to Dedicate this "Art Piece" to all My UK Friends because it was there beautiful countryside that inspired me to create it.. 

I plan to get it beautiful framed and then I will hang it in My Living Room so when we are in the depths of Winter it will make me smile and I will know that Spring will come again. 


I always like to have the back of "My Art Pieces" to look pretty too.  It also has wee flowers blooming on it too.


I discovered a New to Me UK  Magazine called LandScape, I absolutely Love. It truly make me happy setting in my cozy chair and reading all the lovely articles.  Below is the Spring Issue. It has the most beautiful cover..  


My Sweet Grandchildren Ethan with Little Sister Vivi.. They always make me smile...


My Lovely Grand Daughter Chloe with her New Doll called Saige..  I think they were meant to be a team what do you all think??


Guess who has come back to our front yard to explore?

 I will called her Jamima Puddle Duck and her family.  Last year they nested behind My Daylillies under my Bay Window..  I do hope they come back. We had so much enjoyment watching them.


My Long awaited Crocuses has finally sprouted and bloomed.  Also My Tulips have sprouted.  They all make me smile..

Springtime what a Glorious Time of Year...


I have been debating about getting an Ipad Air for sometime. I was not sure I would be able to figure it out. I know I will never Master it but I am enjoying using it so far with lots of help from My Sweetie.

 My Sweetie bought me one last week..


I really like the New Pink Cover for it of course with Blooming Flowers. LOL 

 I would Greatly Appreciate any Suggestions on Apps or programs to download to to enhance or edit my photos for blogging.

 Or any other suggestions you think I would need to know to add to the fun of using the Ipad Air.   Thanks for your help..  


Happy Spring to Everyone.

I would also like to Thank Everyone who stops by and leaves their lovely comments for me to read.. They always make me "Smile"!!

Hugs Judy

Monday, March 17, 2014

MY FIRST WEE WET FELTED SPRING BLOOMING GARDEN TEAPOT


Hello Everyone,
Does anyone remember the Nursery Rhythm called
I am a Little Teapot?
I have been admiring Wet Felted Teapots in the German Felt Magazine and the Australian Felt Magazine for some time.

 I have also admired very lovely "Teapots" on my friend Terriea's blog called Terrie--Smiling. Terriea is a very creative and talented Felter.  Terriea inspires many felters with her lovely work. 

Thank you Terriea for the inspiration to push oneself to learn new techniques.


I received the most lovely surprise in the post this past week all the way from Hong Kong.


 Look what Terriea made especially for me...

 It is a beautiful silk natural printed scarf.  Terriea uses Gum Leaves and other beautiful leaves from her area to make these gorgeous printed scarfs.  Terriea shows you how she does this technique on her blog,  Terrie--Smiling.

Thank you Terriea for the lovely Gift. I will treasure it always.
  

I have falling in Love with Finn Wool

I used Finn Wool to create "My First Wet Felted Teapot". Finn felts up so very nicely.  I love it. I used all the White Finn Wool that I bought to create My  Teapot.


I took a workshop at
 Twisted Warp & Skeins in Merrill, Michigan to create "My Spring Blooming Garden Teapot".. After 3 hours of hard work the photos above is the teapot I took home.

I have taken 2 other short workshops in wet felting to create a flat fabric and a wee Pod but those were several years ago.

In the workshop I had wanted to learn how to create  a seamless teapots but the teacher only knew how to do this with balloons. I had already made a template with plastic material and so I decided to stay with the template.
  I did add a wee resist in the center of the teapot to create "My Spring Blooming Garden" space.
 
 I had never made a "Wet Felted Rope" before and that technique turned out easier than I thought it would be. When wrapping the wool fibers around itself I included some pink too.. You can see wee bits of pink showing through the rope.


When I got home I went to Utube and watched a couple of video on seamless wet felting.. Then I created the "Teapot Lid".. I even add a wee tuck in it to give it some added charm.

 I am never happy with my creations until I add lots of embroidery and or beading. 


So when I got home I started adding embroidery and beading to "My Spring Blooming Garden Teapot".


 I added many pretty beads to create the garden. I also used 2 different shades of Locks to create the grass.

 What do you all think of My Spring Blooming Garden Teapot?


This is the backside of "My Spring Blooming Garden Teapot".


This photo is of My Finished "Spring Blooming Teapot". It makes me Happy when I look at it.

I do plan to make another one but this time I will create one with the theme of "By The Sea"..

 What do you all think???


There was lots of lots of wonderful colorful roving at Twisted Warp & Skein in Merrill, Michigan. I especially like the blended batts.  A Neat Shoppe indeed.


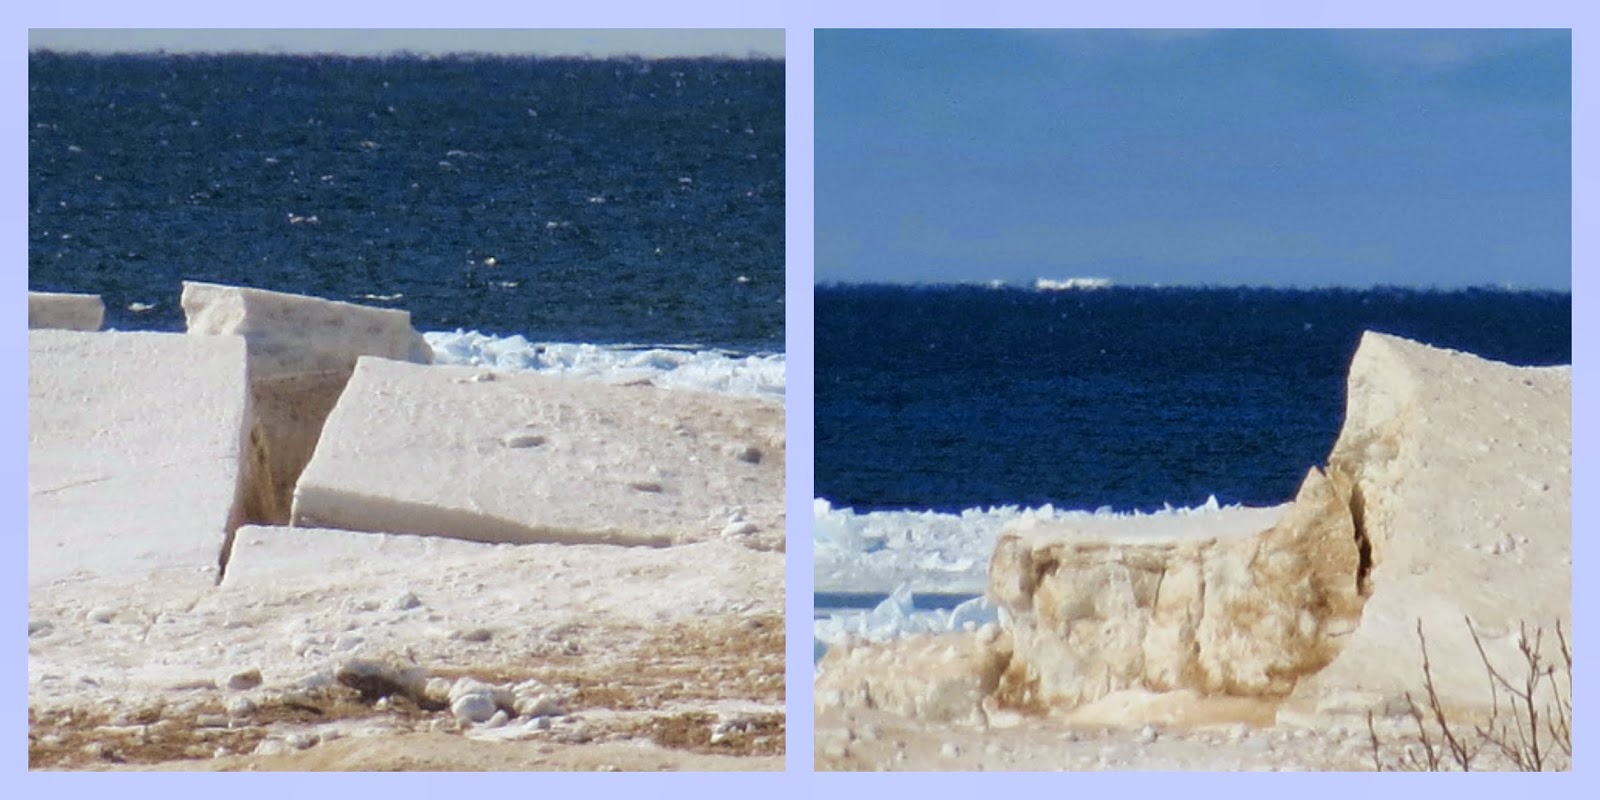
The Coast Guard Cutters have been working for sometime to break up the Ice from our Great Lakes. 
 In the second photo you can see large chunks of Ice floating free in the water.

  The first photo is what our shoreline looks like at the moment.. They tell us we will be lucky to be free of all this Ice until May..  And the waters will be so cold we will probably won't be able to stick our toes in it waters until August.  Can you believe??  

A Winter we will Never Forget.


I am Very Happy to show you all these wee Spring Flowers bursting from the ground in the only place that does not have several feet of snow covering it still..
 This wee garden is under our bay window very near to the cement blocks of the house that is always kept very warm because the sun shines on this spot all day.  Hence No snow..

 So I know Spring will be coming soon. 

I thank you all for visiting my blog and leaving your Lovely Comments for me to read..

Have a Very Lovely Week. 
Hugs Judy
Related Posts Plugin for WordPress, Blogger...